I’m going to go ahead and apologize in advance for what is going to quite possibly be the worst DIY explanation ever. I took a picture of all of the necessary supplies back in October and it is no nowhere to be found. I’m hoping you can at least find some inspiration.
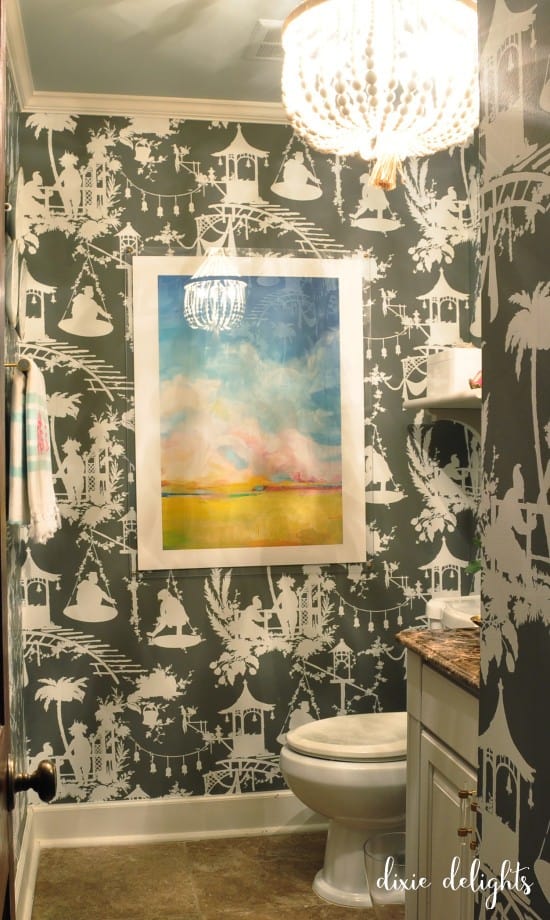
I’ve wanted something framed in a lucite floating frame for ages. Why? I have no clue. It’s not really my style so I can’t explain it. The powder room was the perfect opportunity because I had a free piece of Minted art that was 30×40″. I knew a traditional frame would cost a fortune. Not to mention, I think in the back of my head I also knew I didn’t love the art. So it’s good I didn’t invest in a frame. That being said, if you DO have a print you love and lucite IS your style, this tutorial is for you :-)
It’s a fairly simple process, but due to the size of this piece, it did take both Honey and me to hang it.
You’ll need:
- Two pieces of plexi glass cut larger than your poster/picture. Home Depot will not cut plexi glass, but Lowe’s WILL!
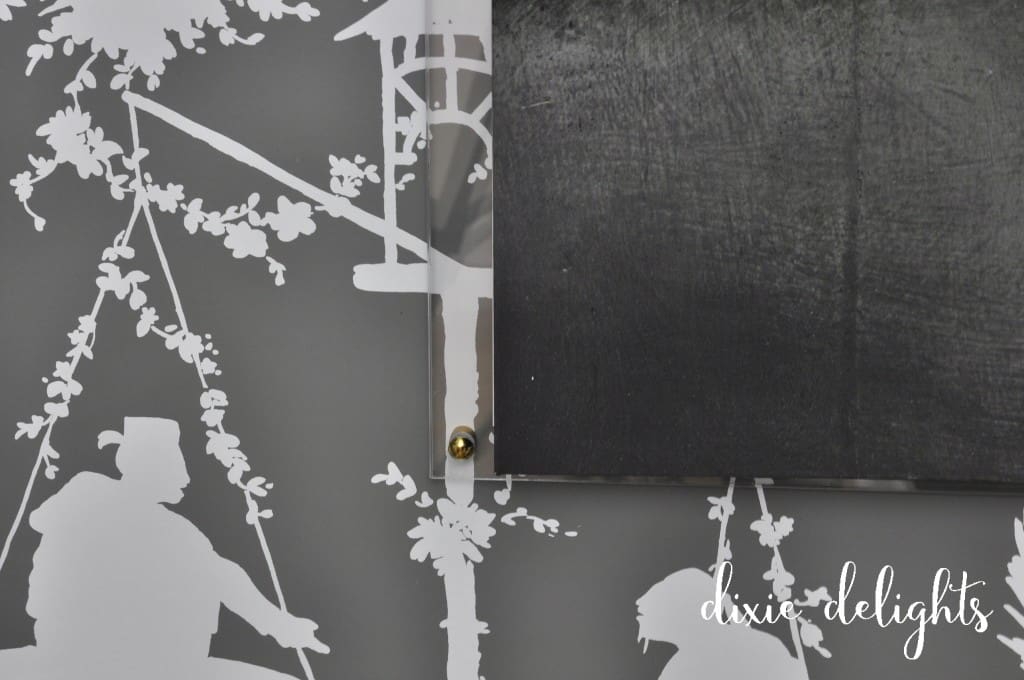
- 4 small cylinder things with a hole cut through the middle. I WISH I had a picture of these. I found them on a random aisle in Lowe’s for a few pennies. They are needed to have the frame float out from the wall by just a smidge. I didn’t think having it pressed to the wall would look good.
- 4 screws long enough to go through both pieces of plexi glass and through the aforementioned cylindrical thing
- 4 upholstery tacks
- gold spray paint
- double stick tape
Here’s how:
- Remove the clear protective sheet from both sides of one piece of plexi glass
- Use double stick tape to adhere your poster/print to one side of this piece of plexi glass – be careful not to let fuzz, hair, etc. stick to the plexi glass
- Drill 4 holes through the corners of the first piece of plexi glass
- Hold this up to the wall and predrill holes into the wall
- Remove the clear protective sheet from one side of your other piece of plexi glass
- Lay the second piece of plexi glass perfectly on top of the first (the side you just removed the protective plastic from should go down) and use a sharpie to mark where you need the 4 holes; These MUST match up
- Drill 4 holes through the corners of the second piece of plexi glass
- Now, you want to put your screw through both pieces of plexi glass and stick it through the cylindrical thing and start screwing it in place on the wall; My cylindrical things were silver so I spray painted them gold
- Remove the protective sheet from the top of the art, now that it’s hanging
- Cut the tack ends off of 4 gold upholstery tacks; Use a dot of glue to attach them as covers on the screw heads
And voila! A floating lucite frame!!! It really wasn’t hard, but did require four hands because our piece was so big.
Now, the “funny” (or perhaps “awful”) part is that I came to terms with not liking the poster after it was securely ensconced between the sheets of plexi glass. I came home with a new canvas and Honey was not too happy that I wanted to take the whole frame contraption down AND he pointed out that the new canvas would not cover the holes in the NEW wallpaper. UGH. But don’t fret, after a quick trip to the garage he came back with a command hook and hung my new canvas right on top of the old poster. I actually LOVE that the lucite frame peeks out from behind. As luck would have it, the canvas is the exact same size as the poster, so it perfectly covers the poster and the lucite frame has the same border peeking out from all sides. It’s just a fun, modern touch. Here’s a little peek of the new look…
If I can get my act in order I’ll take pictures of the room for a re-reveal really soon!!
xoxo
Dixie Delights
Home Tour | Holiday & Seasonal | Delightful Decor
DIXIE DELIGHTS DELIVERED
[madmimi id=246857]


I’m eagerly awaiting your re-reveal of your powder room. Truth be told, although you did a great job with it, the ORC “after” didn’t quite look like you. Still a gorgeous room, but I’m excited to see the changes. I’m also eagerly awaiting your CA trip report!!
You are a hoot! And the wallpaper is so so gorje! Can’t wait to see the new art!!
I’m on the hunt for the gold cylinder things that you found in the hardware store. I found something called “finishing washers” that look like what I imagine you use. I am curious if these look close to what you used. If so, great! Now I’m trying to figure out what type of screws that you used that have a sphere head? Love those. Love this project & cannot wait to gather everything & get started! Thanks for your help!!!