
If you follow along on Instagram, you will know that I headed down to Savannah before the sun came up to spend three days with Mother for her 70th birthday! I told her to make a list of anything she wanted to do together during my visit and that I would be game. The very first thing we did was tackle hanging some plates in her dining room.
This was a little challenging because we not only needed the three plates spaced correctly under the first sconce, but we needed to copy the whole arrangement under the second sconce on the other side of her china cabinet. She thought this would make a great blog post and I agree! I’ll explain how we did it, but first, here’s a picture of what it looked like when we were done.
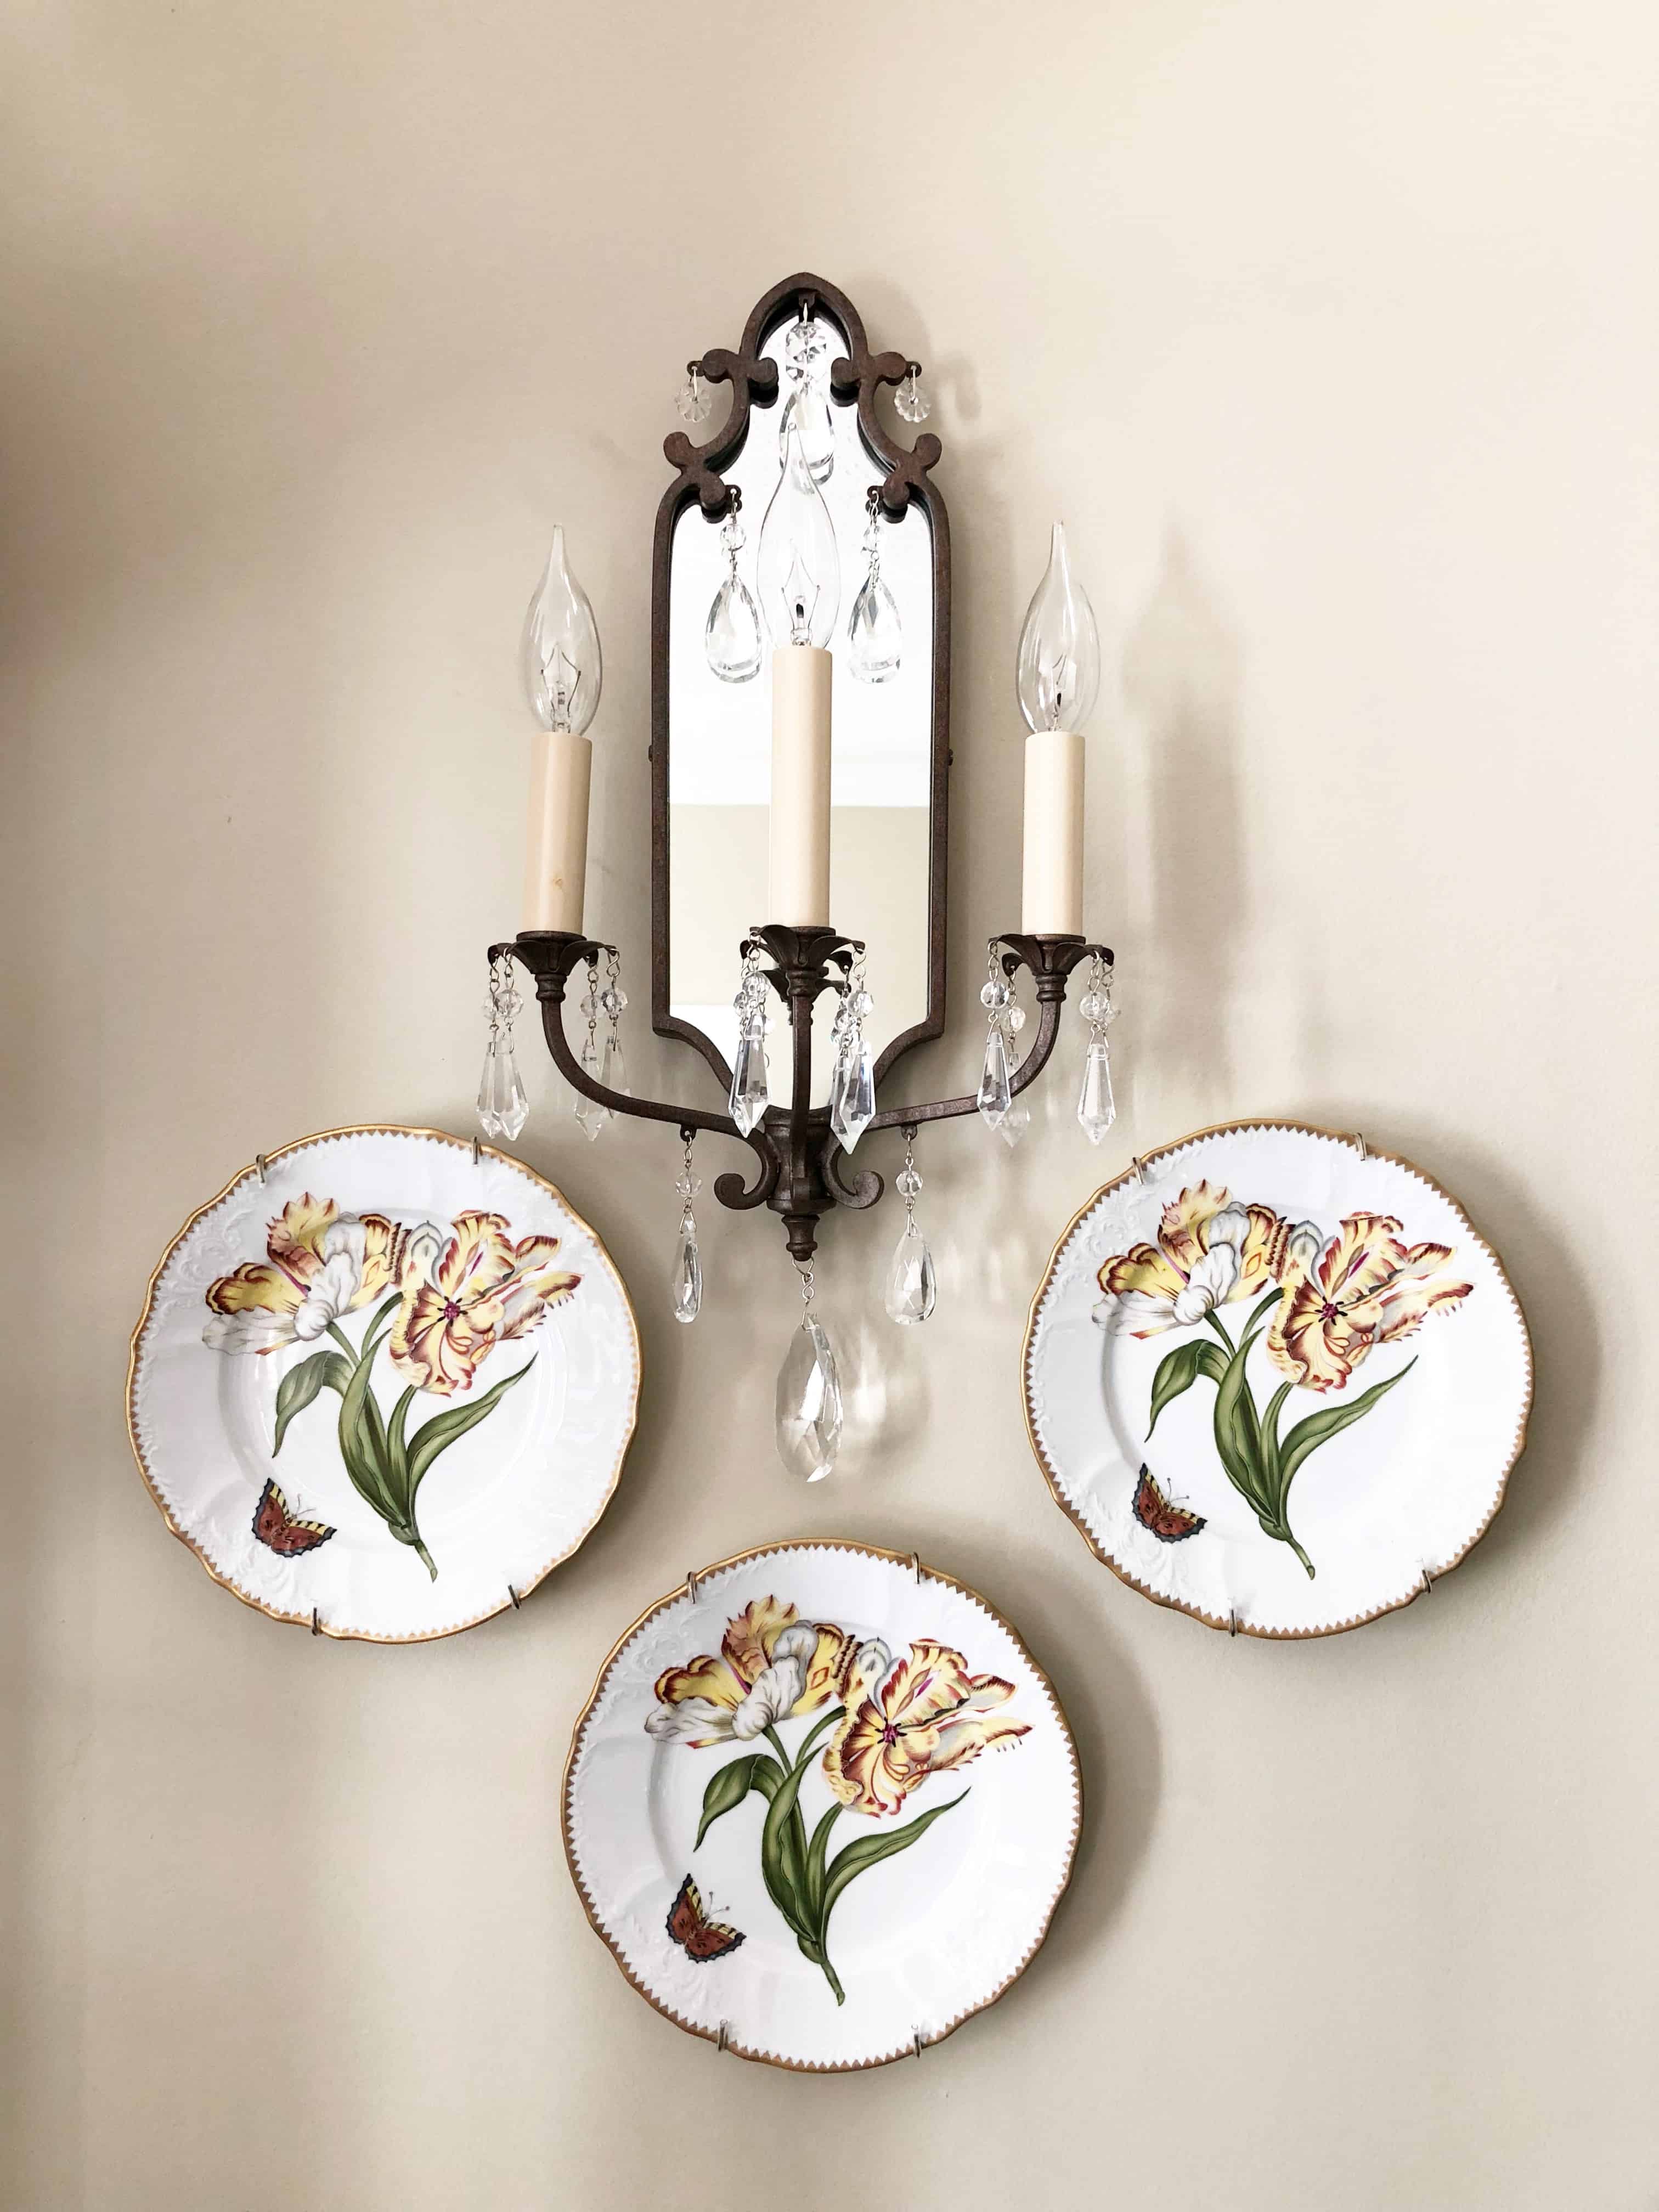
We hung the first plate centered directly under the sconce by just eye-balling it. Then, we hung the second plate to the left of the first plate, also by eye-balling. These two were easy!
Now, since we needed the third plate on this side to line up directly across from the one on the left and we didn’t want to have to break out the geometry, we used Daddy-O’s old, heavy, rusty carpenter square. As a side note, this is a pretty valuable tool to have in your stash and comes in handy at the oddest of times. If you get one, make sure one side is at least 24″, in my opinion.
I lined the square up with the bottom edge touching the bottom hook and the left edge touching the left hook, completely squared off. This told me that the hook on the left measured 6.5″ across and 7″ up from the bottom hook. I simply flipped the square over and then used it to measure 6.5″ across and 7″ up on the other side to know where to put my third hook!

Now we needed to repeat the entire process on the other side. We WAY over complicated this but I think it is worth sharing. What we should have done was hang our first plate under the second sconce by measuring the distance straight down from the bottom of the first sconce to the hook of the plate hanging directly under it. Then, use our handy carpenter square to do the whole 6.5″ across and 7″ up measurements.
What we did was not necessary in this instance but I thought I would share it anyway because it would be a handy technique if we had more plates in this arrangement or a more complex arrangement that we were trying to duplicate on the other side.
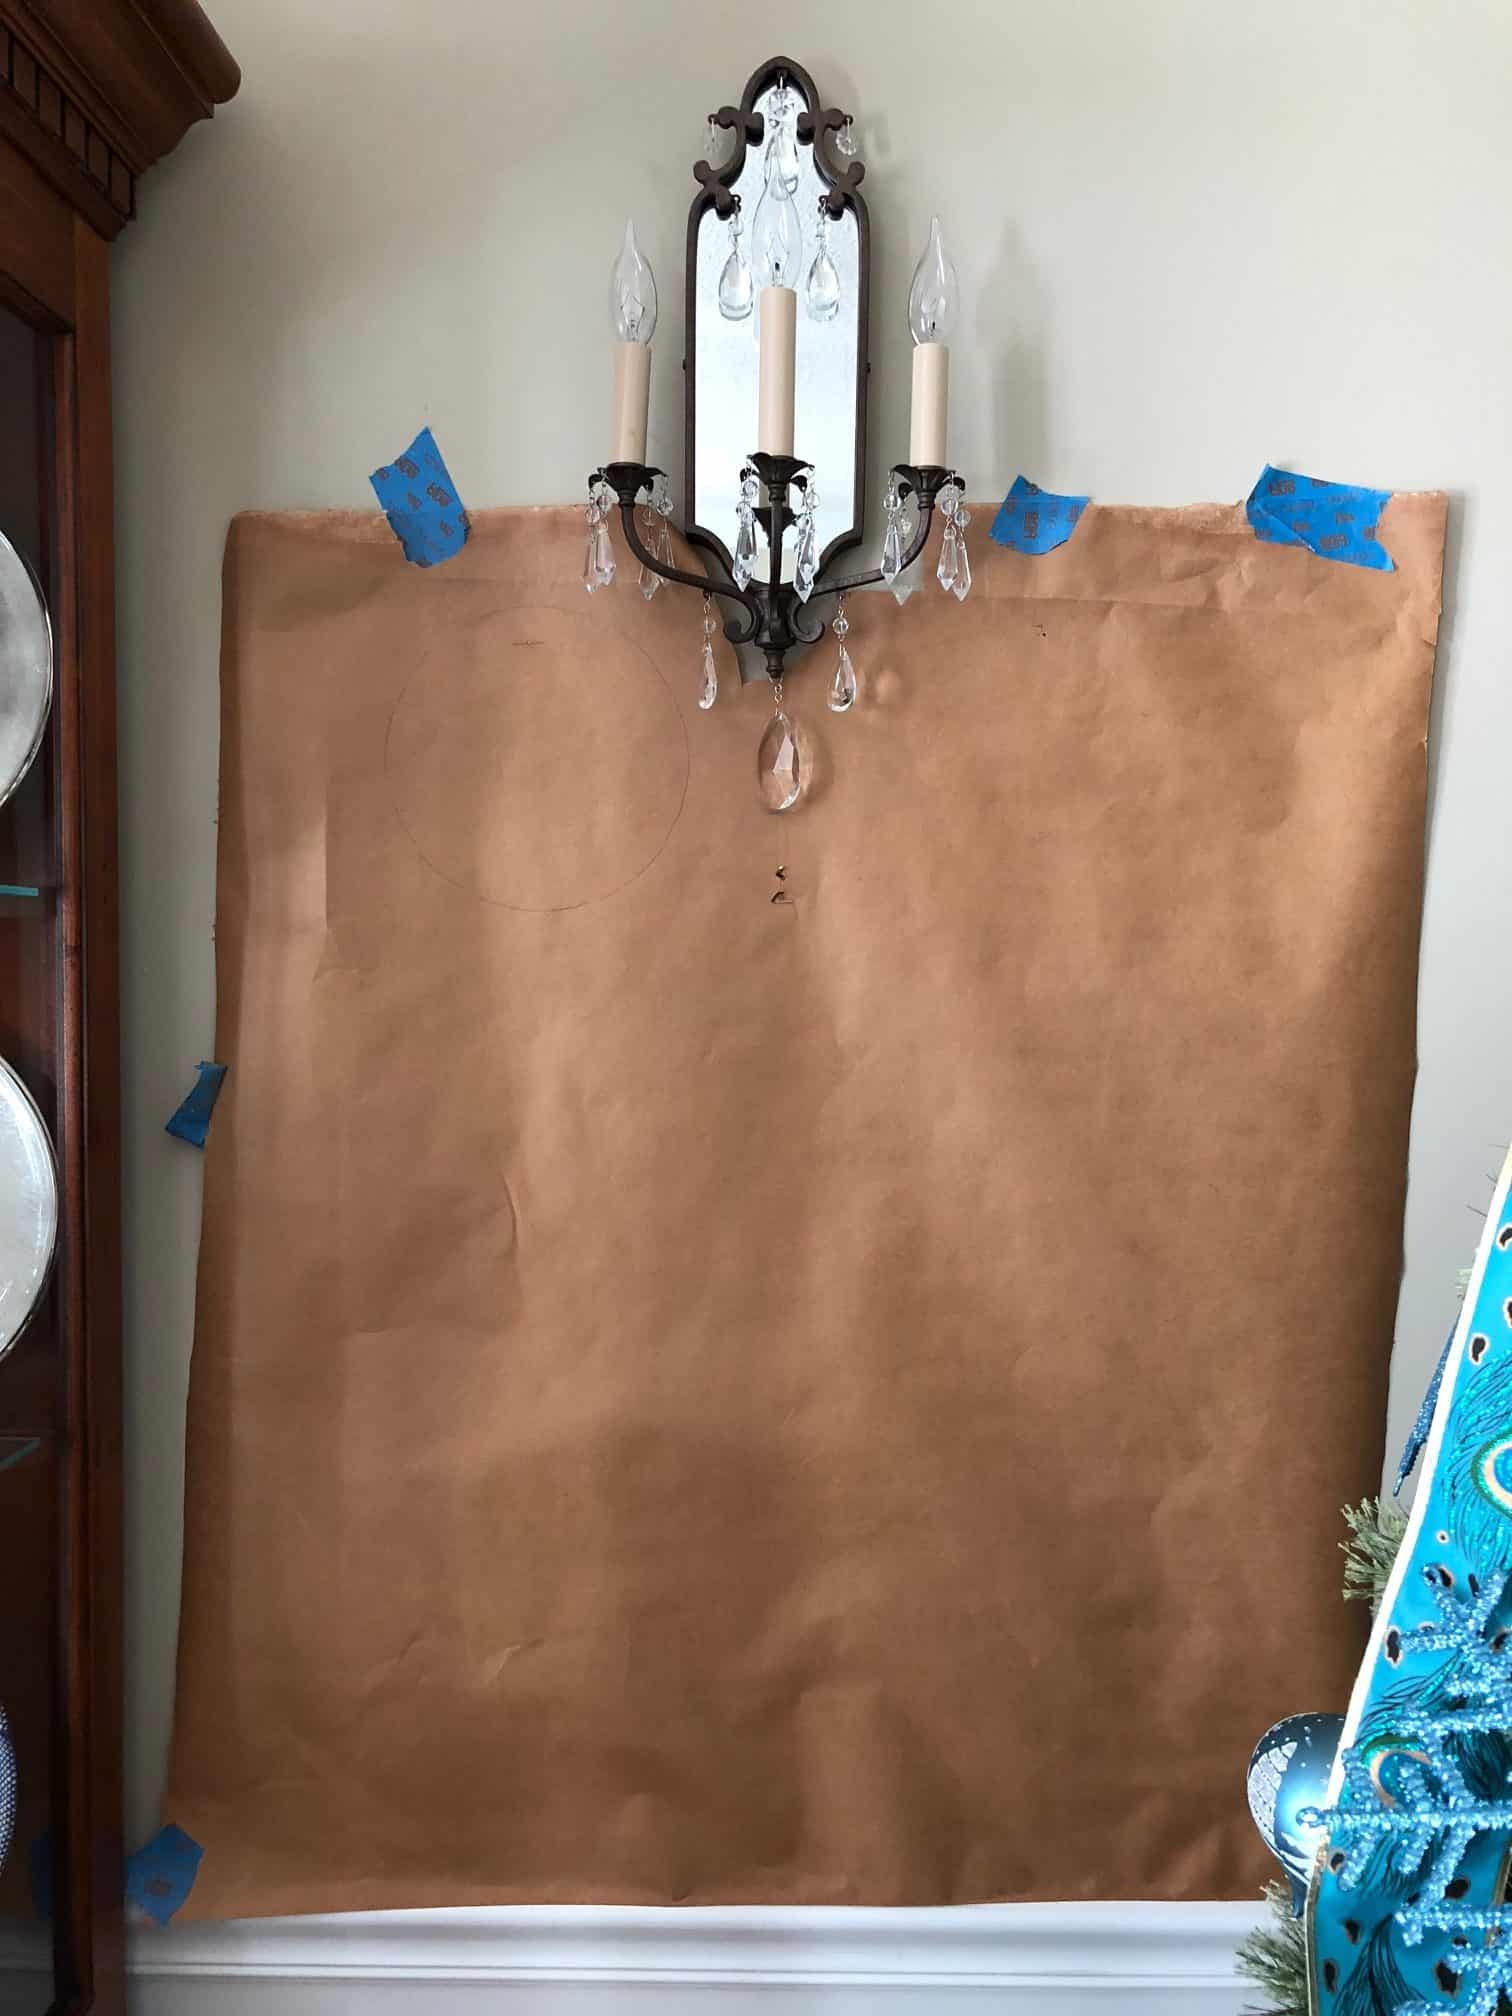
Mother and Daddy-O have had a roll of butcher paper in the garage for as long as I can remember. This too comes in handy for all sorts of things. We cut off a large piece, leveled it up with the top of the chair rail under the first set of plates, and taped it to the wall with painter’s tape. Then, we just poked the top of each nail through the paper to make a template.

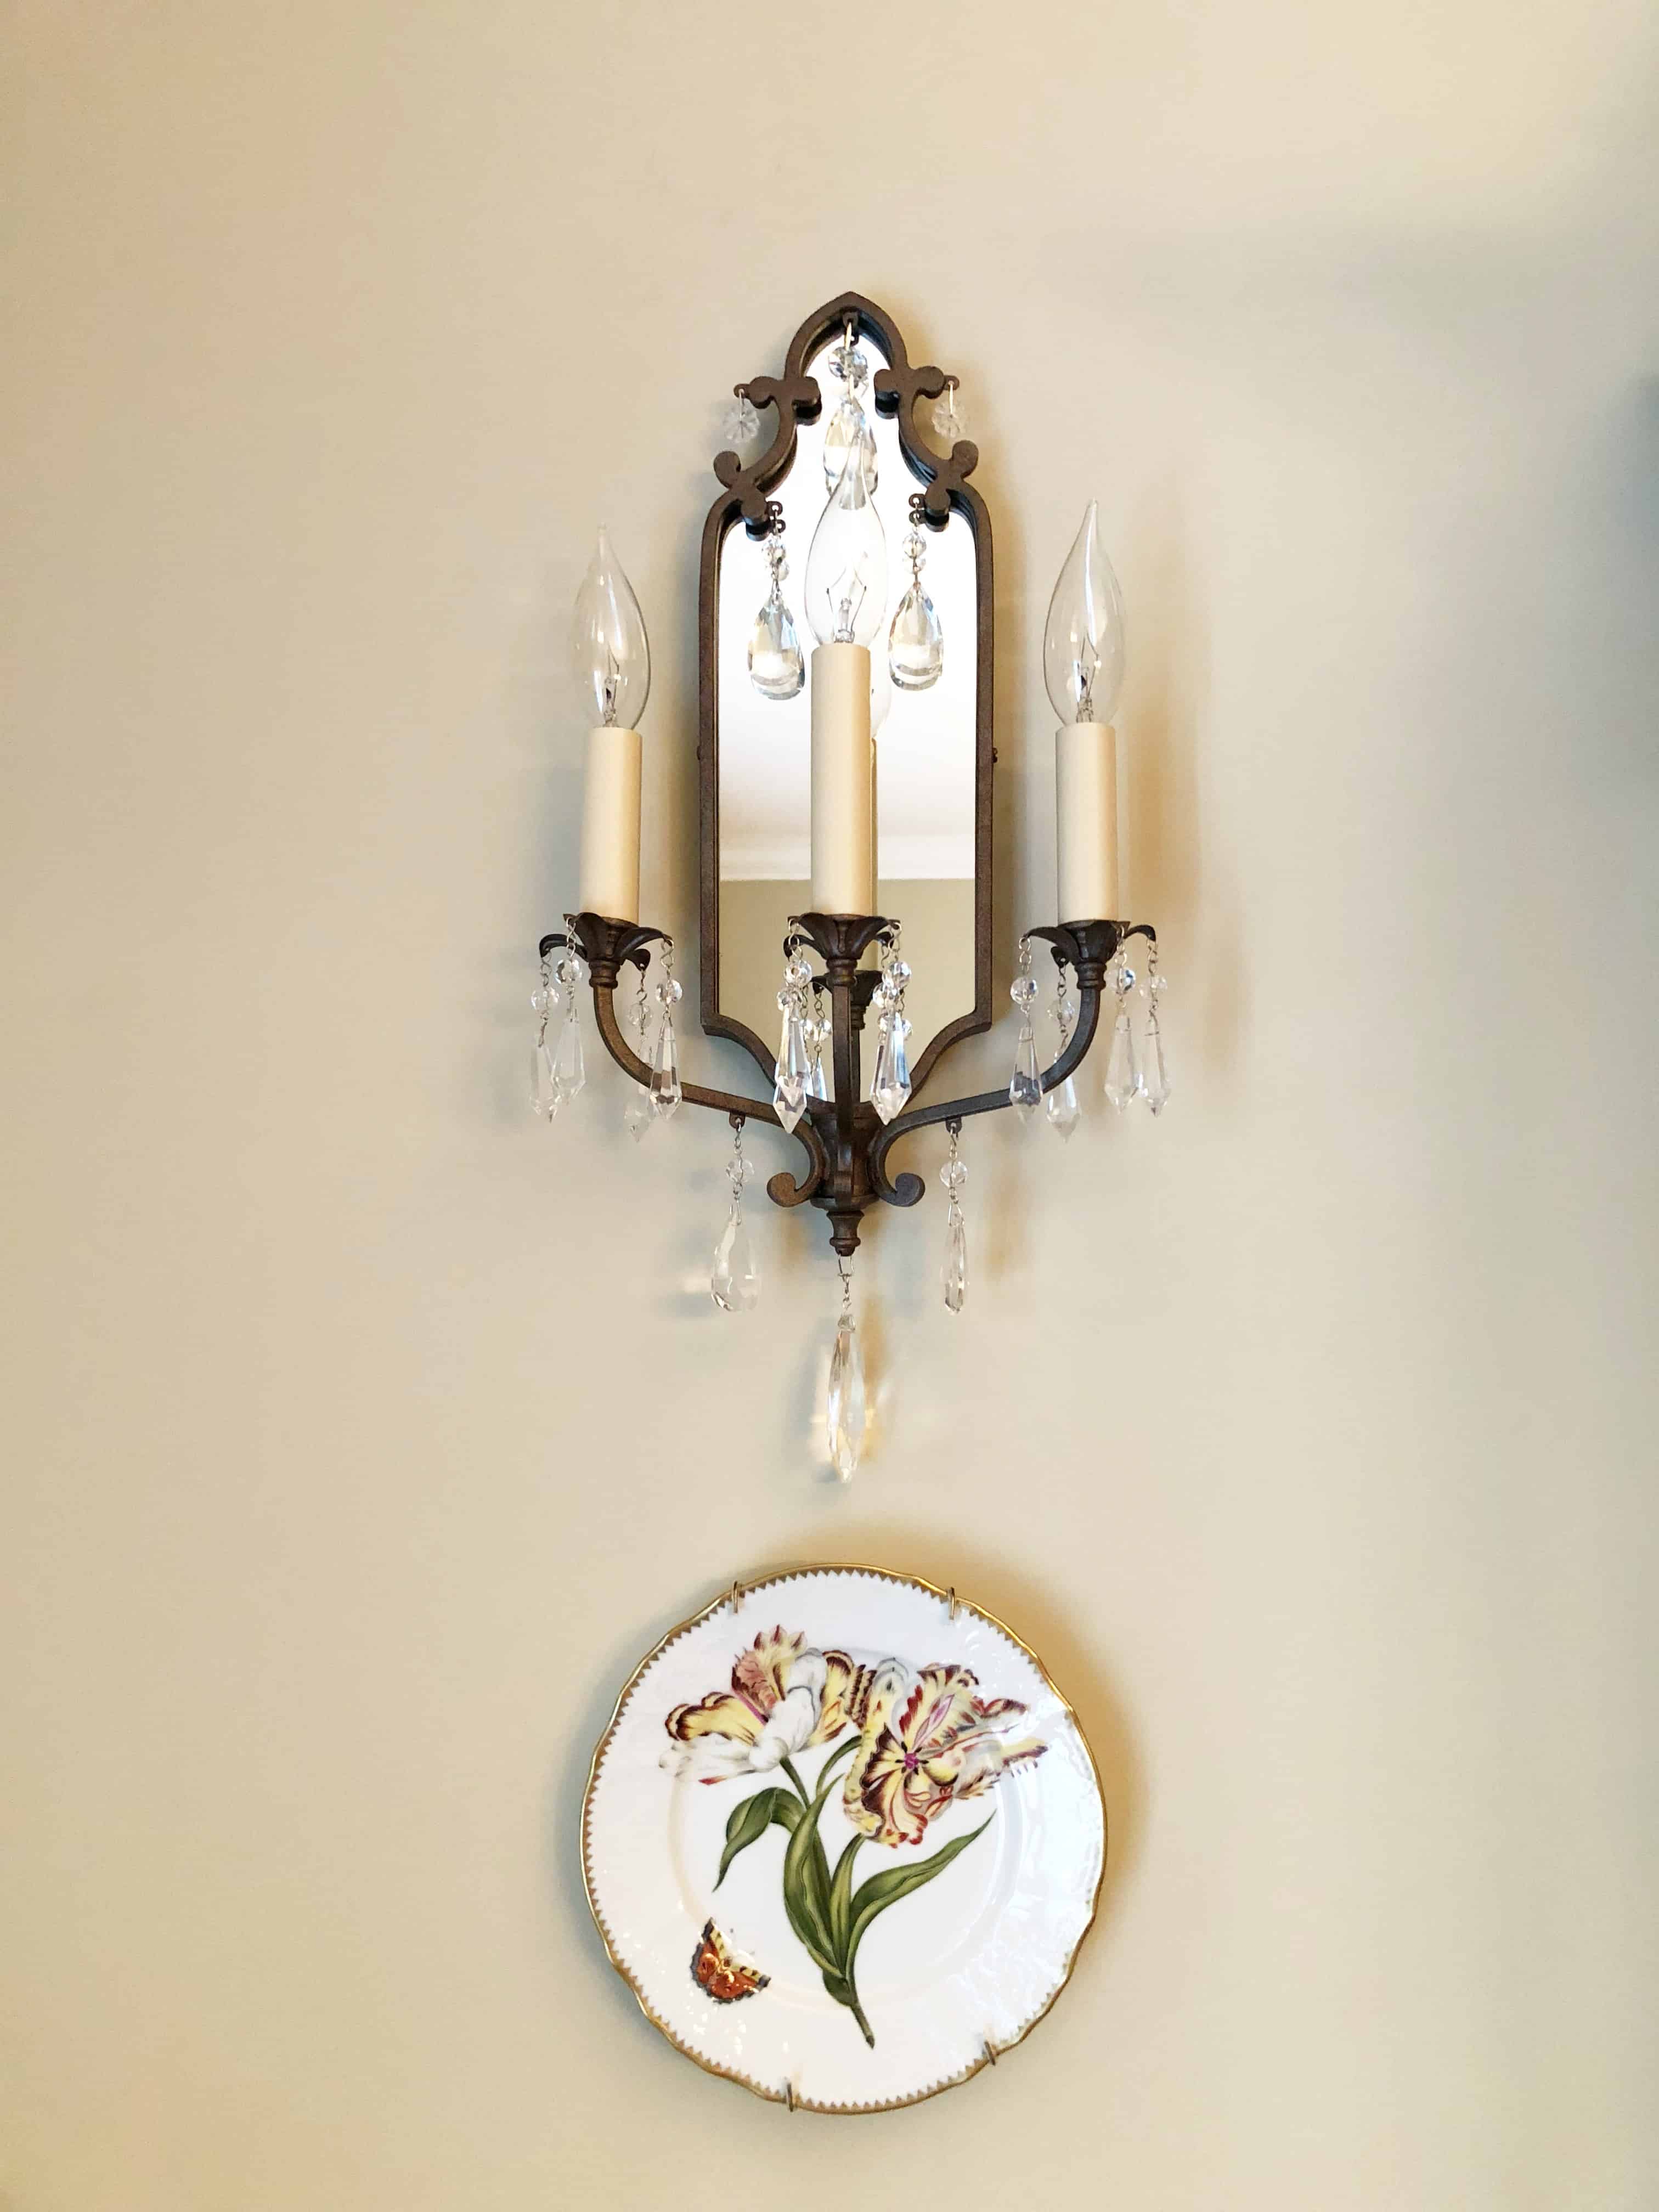
Then we hung the first plate on the second side just as I described above – by measuring the distance straight down from the bottom of the first sconce to the hook of the plate hanging directly under it. We found the center of the second sconce, measured the same distance and hammered in the first hook.
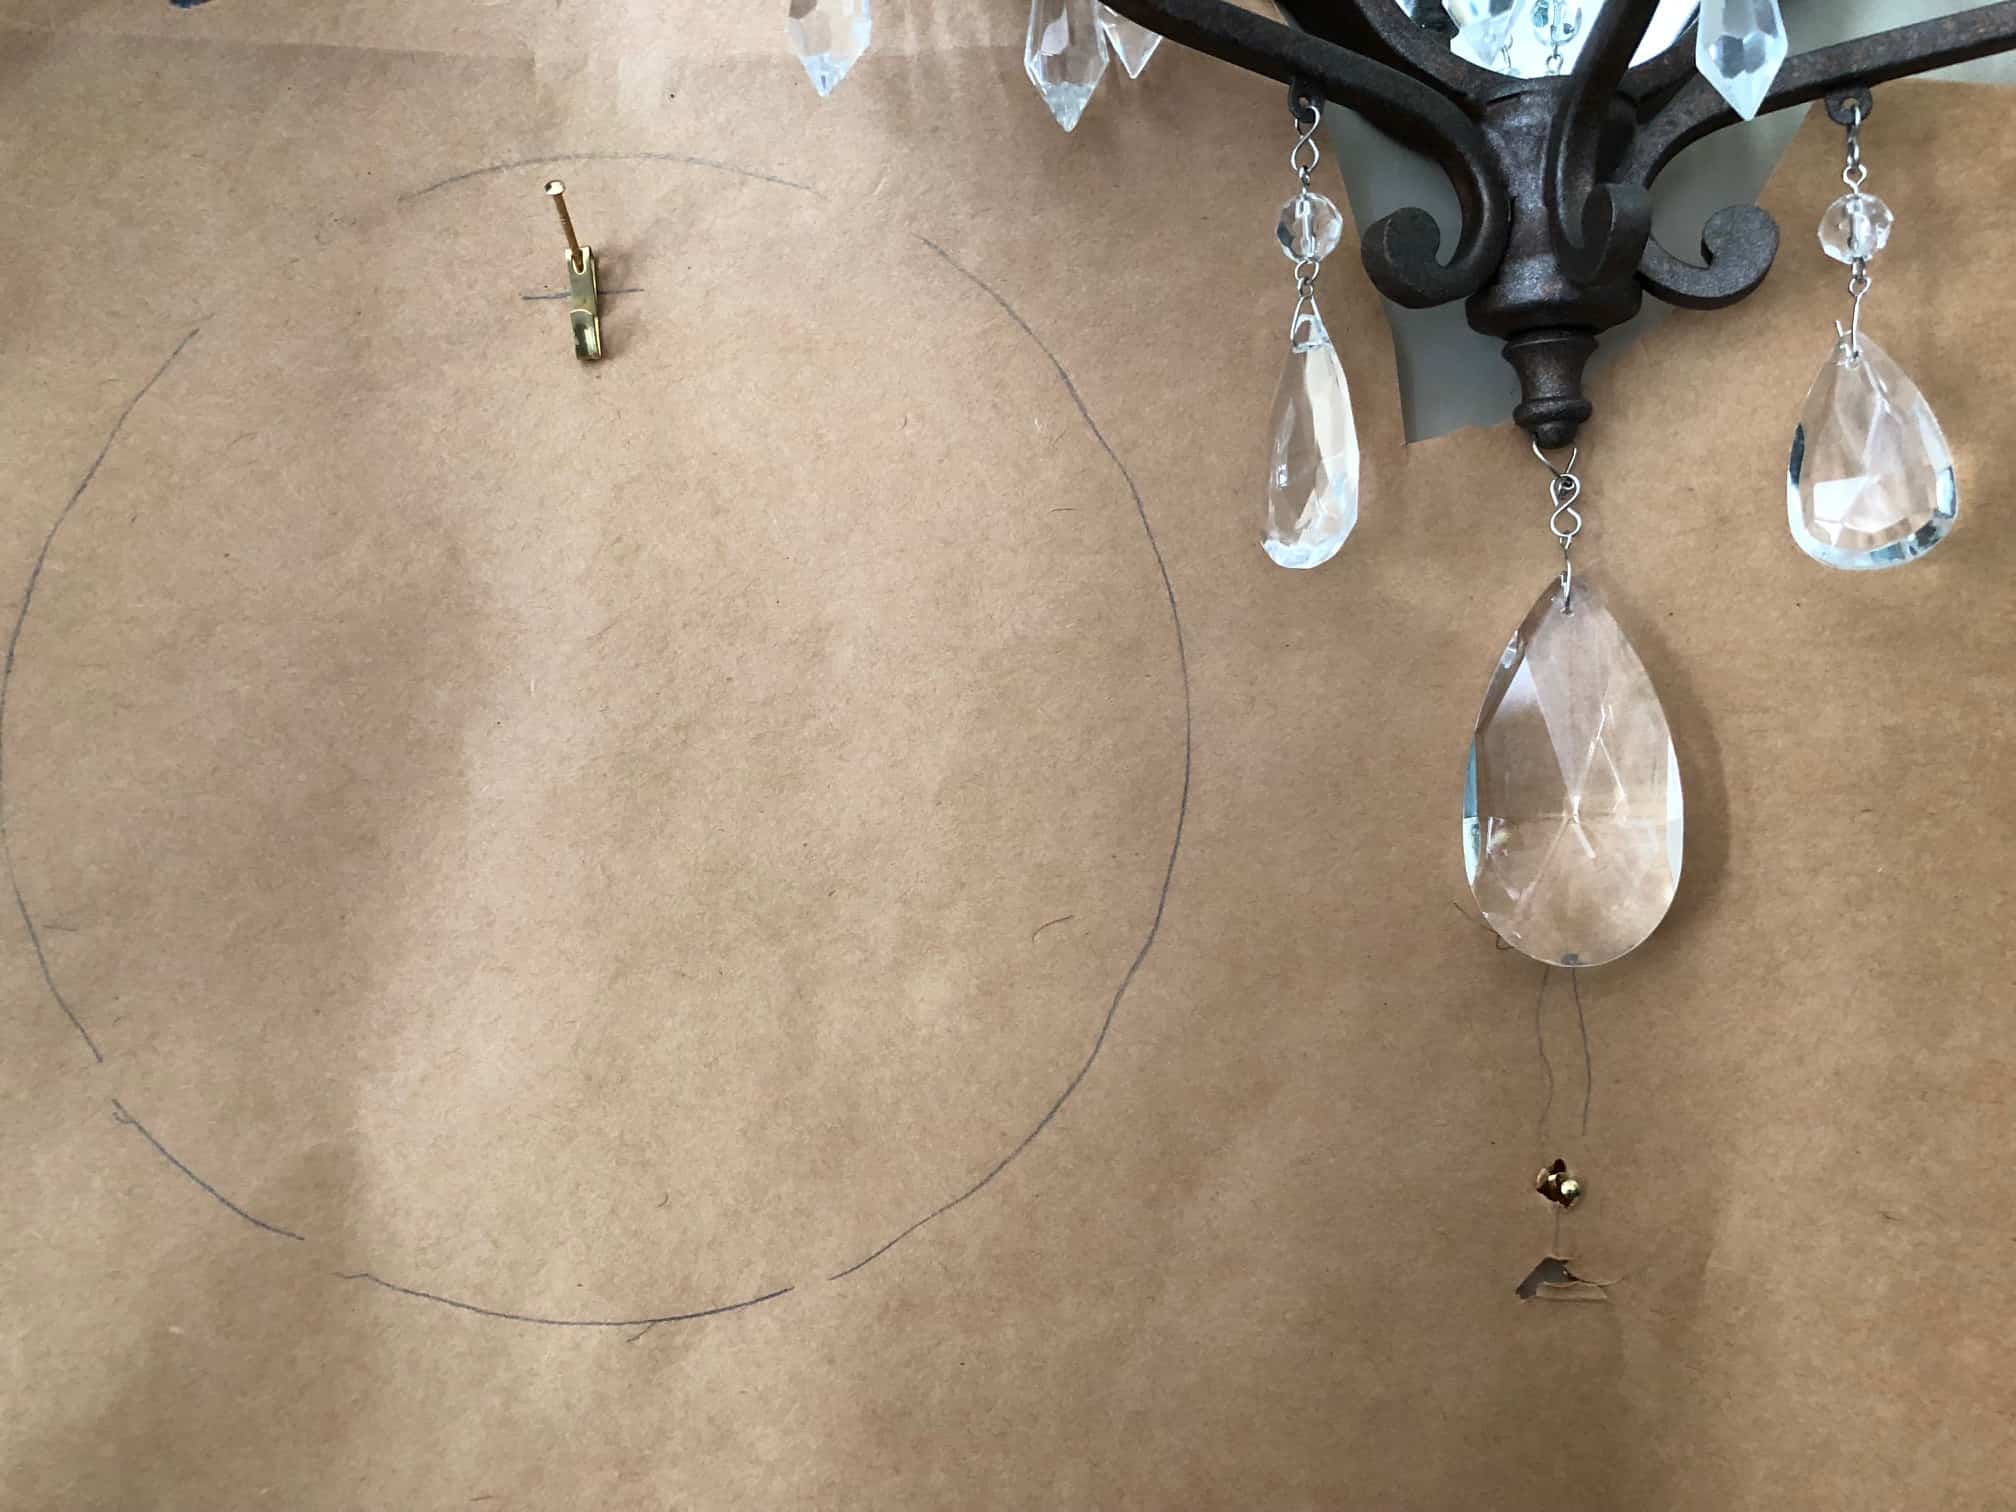
Lining up our paper template on the chair rail, we then located the nail we just hammered in and used it as the anchor point for our template.
With everything lined up, all we had to do was hammer in our second two nails in the little holes we made from the first set of plates. We went straight through the paper, as you can see here.
We took the nails out, took the paper down, put the nails back in and hung our plates. They perfectly matched the first side! Now, as stated, this wasn’t really necessary for this project, but would have been nice if we had had more plates or a non-square arrangement.
I’ve noted this before, but both Mother and I (and Sister too) always use these OOK plate hangers. They are a few dollars a piece and include everything – even the hook and nail! They come in a few different sizes so measure your plate and you’re set. When in doubt, I always go up a size. It also helps to use a tape measure to measure the BACK of the plate from top to bottom to account for any curves in the plate.
I can’t wait to share the rest of our time together!!

OOK plate hangers | carpenter square
affiliate links used
DIXIE DELIGHTS DELIVERED
[madmimi id=246857]
Great tips Amanda. I never hang anything with out my laser level! The plates look great, and I love those sconces.
Hanging things correctly is definitely not my strong point – I appreciate the tips! xo