
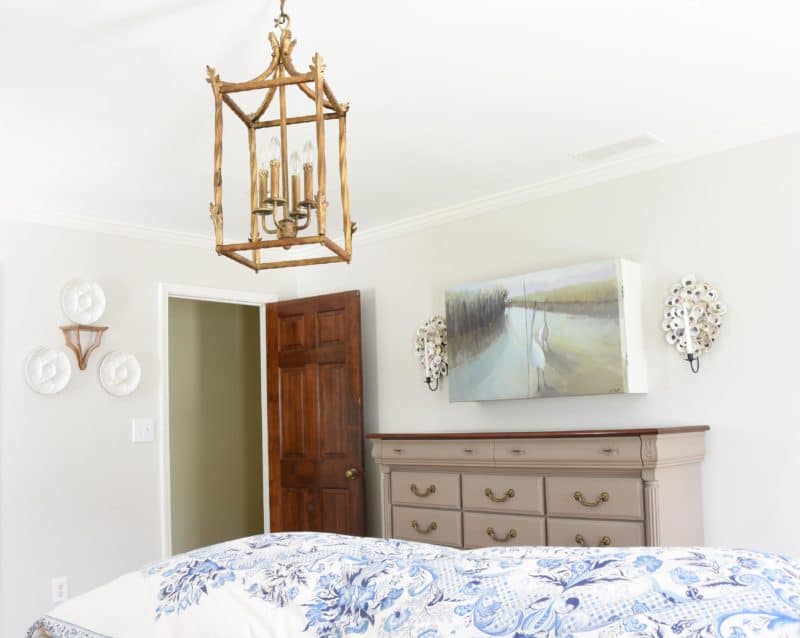
Change is afoot in our bedroom! Last year I picked up the most gorgeous antique mirror while home in Savannah. I has finally been hung in the master bedroom and is just stunning. Buttttt…. as often happens, that change has led to a slew of others. There was really nothing wrong with the bedroom before. In fact, I pretty much loved it. But, I loved the mirror more and it needed a home. After living with the mirror (pics to come), I decided that the chandelier needed to be gold. It just wasn’t working with the mirror in it’s pewter-ish state.

So, Honey took it down and with two quick and easy steps, it now has a beautiful, authentic, antique gold finish. Here’s how:
STEP 1: SPRAY
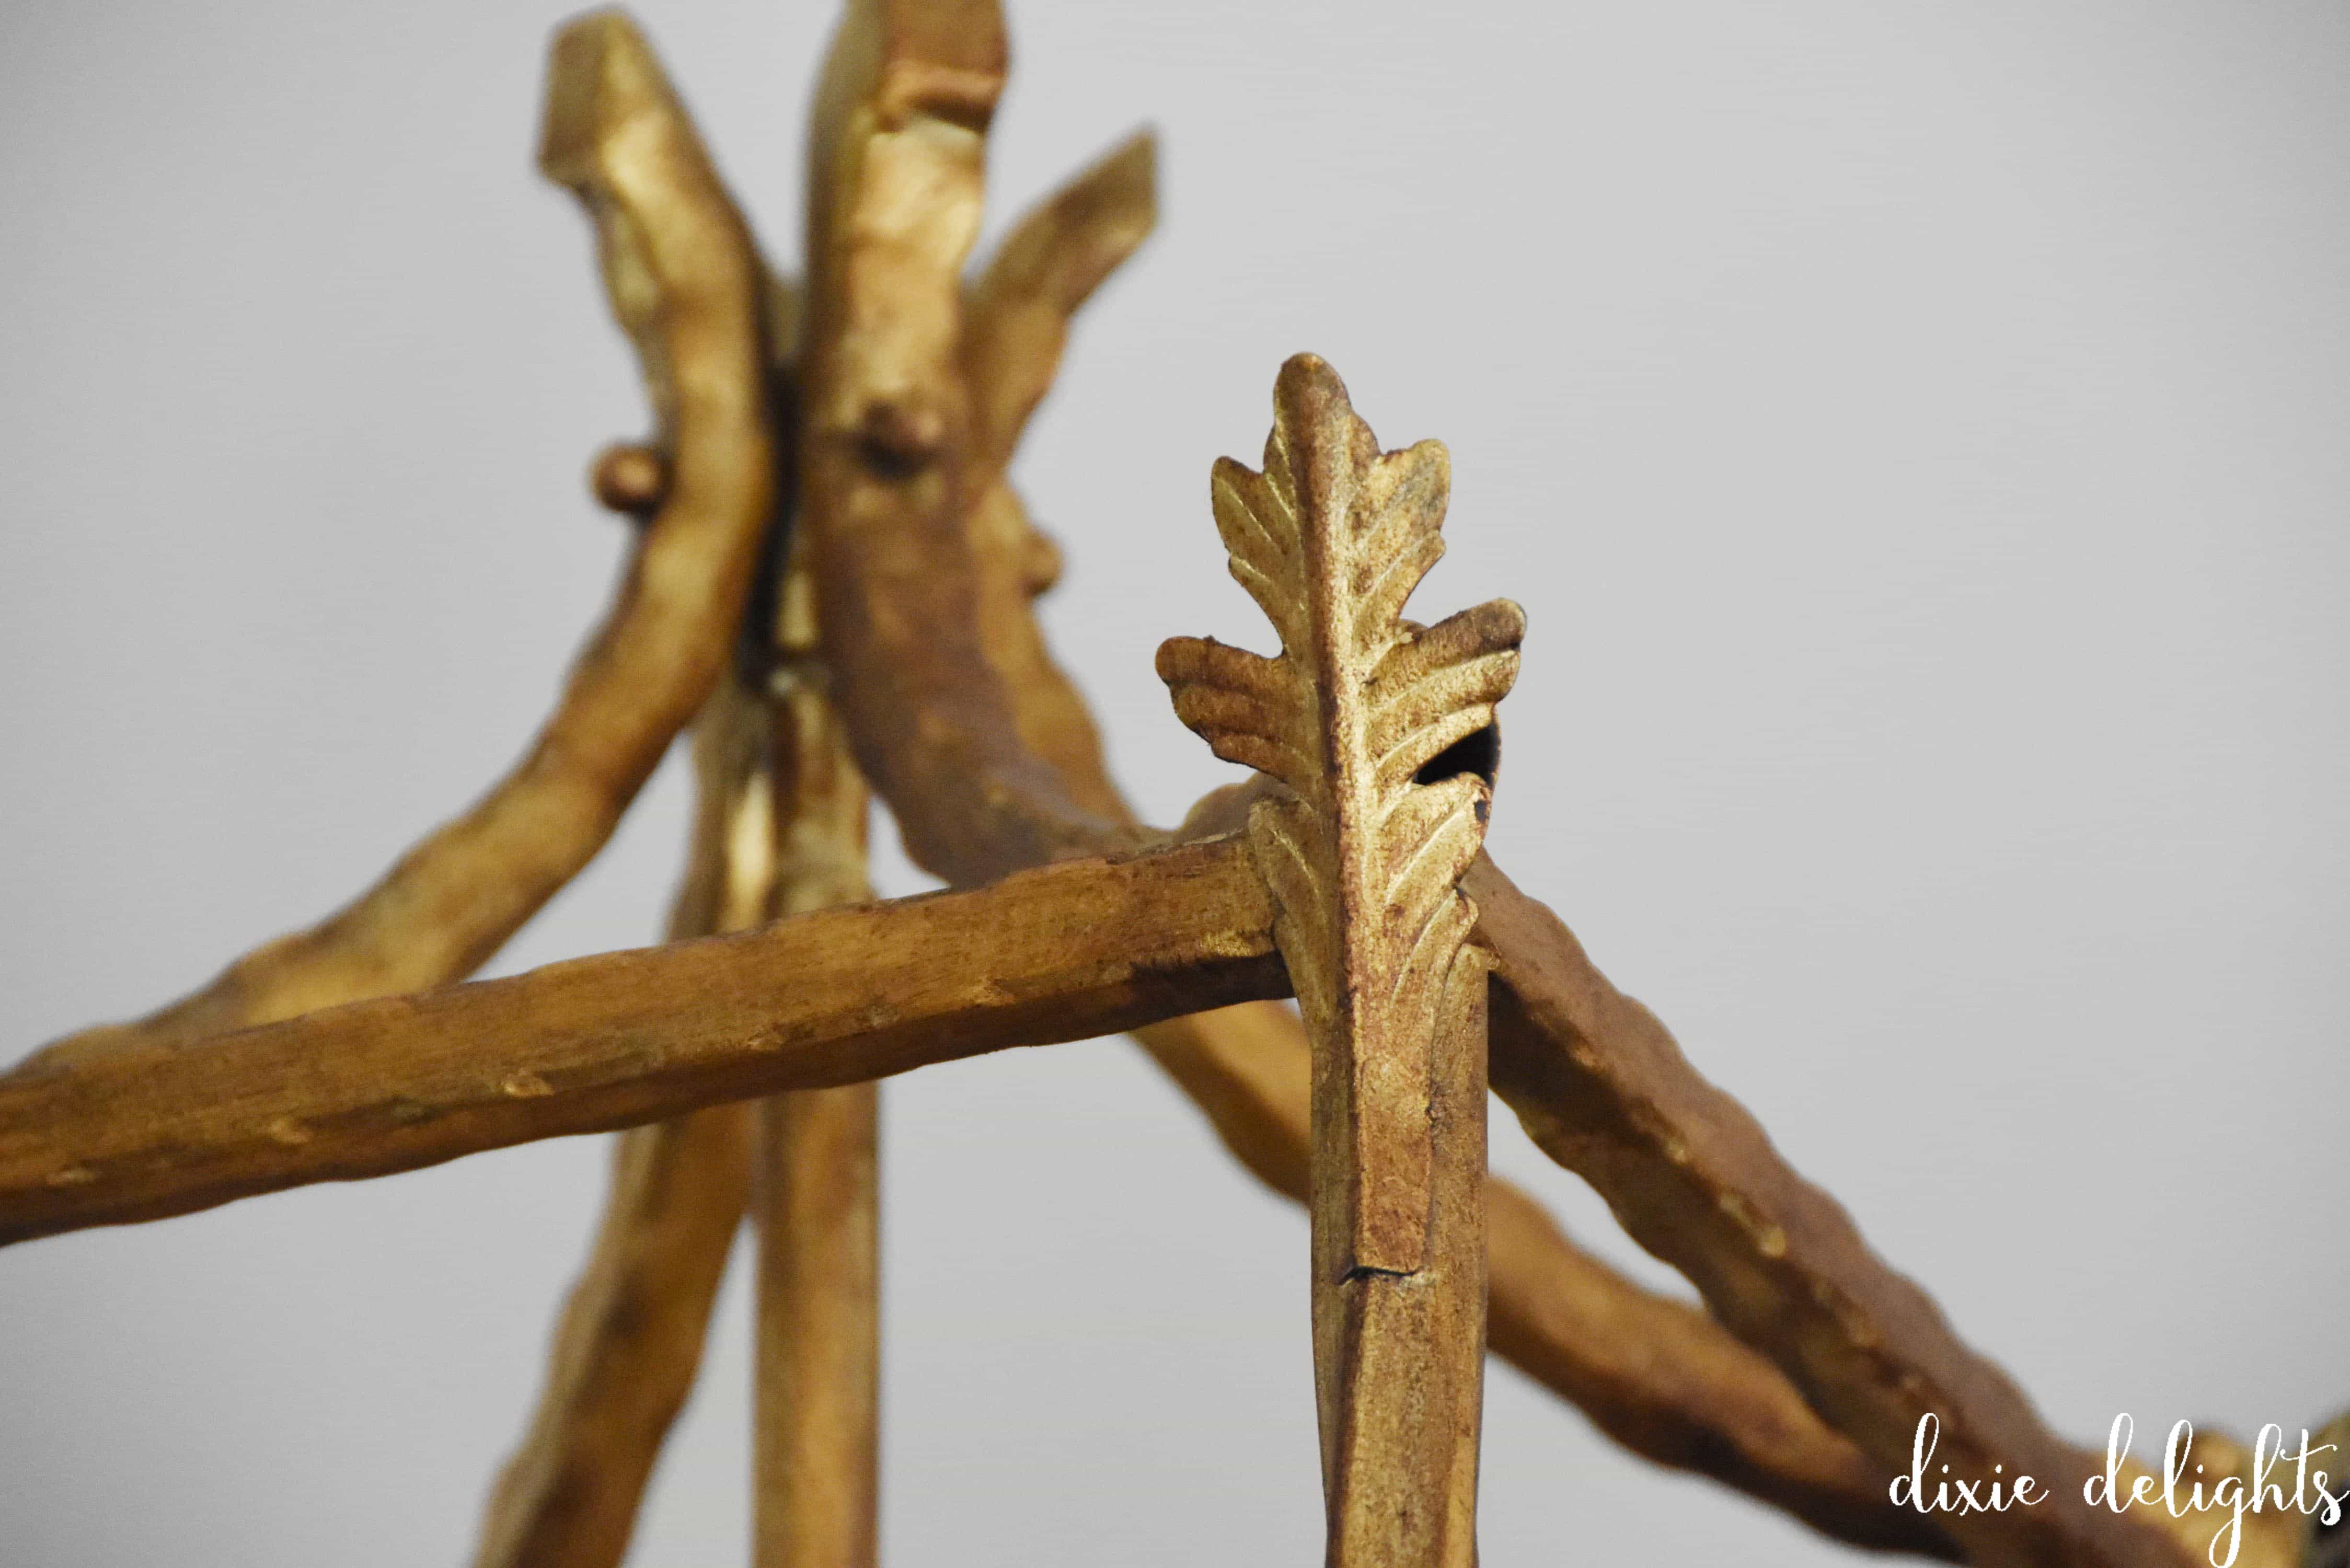
Give it a coat of paint with my favorite spray paint in gold leaf. While this works perfectly on smaller items, it just seemed too flat on the larger chandelier.
STEP 2: WAX
Rub on Annie Sloan’s dark wax! This is so quick and easy and really makes the chandelier gorgeous. I use a regular paint brush for this and did it while hanging up in the room. Use just a little at a time and have a towel or cloth to rub off the excess.
And here’s how the finished project turned out…
You can see the chalk painted dresser peeking out in the background here.

I bought the chandelier for next to nothing on ebay years ago, but I still loved its lines and didn’t see any need to replace it. This was the perfect, inexpensive (I already had the paint and wax from other projects so it was FREE for me!) and easy solution.
I had ordered new night stands but found out they are now on backorder until January. While I’m not sure what I’ll do about that, I’ve got other projects in here to keep plugging away at.
Stay updated here:
- Gorgeous new rug with amazing patina
- Chalk paint on the dresser
- 2 simple steps to an antique gold chandelier finish
- The China Men
- Adding Blue Mikado accent plates for scale
- Flemish bedside chests
- Baby’s Bottom sheets
- DIY flower arranging tips from a novice
- Acrylic curtain rods

The Delightful Home: Our Bedroom
Krylon Spray Paint in Gold Leaf | Shop Dixie Delights on Amazon
affiliate links used
DIY flat screen tv cabinet | oyster shell sconces | new rug | dresser paint
Master Bedroom | Home Tour
DIXIE DELIGHTS DELIVERED
[madmimi id=246857]
Love the way the chandelier turned out! And I really love it when things come together easily (and cheaply)! xo
Oh me too. Because we both know that isn’t always the case :-)
So I have the exact same situation with a chandelier in my dining room- it too needs to be gold. How long did you let the gold leaf dry before you put the wax on? Thanks :)
Oh, a good couple of weeks. Due to laziness, not that it needed that long :-) As soon as your spray paint is dry you can wax.
Great tutorial Amanda…I often use burnt umber to tone down some paint finishes that are a bit too bold. I will be on the look out for that wax.
Great idea to use the burnt umber as well!
It looks fantastic!!
Thank you!!
It looks incredible and I love the newly painted dresser too!
Shelley
Thanks, Shelley!
Man, what a difference. Looks wonderful!
I know!! It is a huge difference. Thank you!
Mrs. Coke-cola (insert wink here)
I anticipate the daily arrival of your blog posts in the “in-box” – today’s was such a treat, and the historical post reference are a BONUS!
Thank you for sharing your home and the loveliness you create!
Cheers,
Sarah
I enjoy sharing it all. Thank YOU for reading! xo
Beautiful!!! It looks like you spent thousands!!! Thanks a million for the paint tips!
I was so happy to share!
Nicely done. And can I just say that I really appreciate that you wrote “finished project” instead of “finished product”? I cringe every.single.time I read that on a blog! No one is selling anything, so it’s not a product!
I’m glad I got it right :-) I type these posts so fast that I don’t always go back and proofread. It kills Mother.
It looks amazing. The wax made all the difference. I need to remember this trick.
Thank you! It was SO easy!
What a lovely difference! I adore chandeliers in the bedroom, but alas I must have my ceiling fan to keep me cool at night?. How do you make it through those long hot Atlanta nights without one??
We actually took down the ceiling fan that was here when we moved in. I get a really bad stuffy nose from ceiling fans so we have a hunter table top fan on the dresser in the summer that we can point away from me but still gives off a lot of cool air :-)
It looks gorgeous. Did you actually spray paint it while it was still hanging in the bedroom?? If yes, any tips on how to accomplish that?? Thanks.
No – Honey took it down and I spray painted outside. However, I did put the wax on it while it was hanging because he was too quick getting it back up.
How long did you leave the wax on? I tried this and it left it black. But when wiped off it came clean off maybe leaving a little black residue – nothing like the gilded look you have. I used the same spray paint. Wondering if l need to let the paint sit longer on it – it’s only been 24 hours.
Hmmm… only for a few minutes before buffing. I didn’t wipe it off entirely, just used my brush to spread it in. I used the same process with the same two items on my fireplace screen as well. I didn’t let my paint dry any more than a few hours on that one. What type of wax are you using?